
Looking to remove the ignition lock cylinder on your Chevy without a key? You’re in the right place. With the help of a detailed diagram, this article will guide you through the process step by step. Whether you’re facing a broken key or lost it altogether, don’t worry – we’ve got you covered. Let’s dive in and learn how to tackle this task like a pro.

Step-by-Step Guide: How to Remove Ignition Lock Cylinder on a Chevy Without a Key
Welcome to our detailed guide on how to remove the ignition lock cylinder on a Chevy without a key. Whether you’ve lost your key or need to replace the cylinder for maintenance purposes, we’ve got you covered with easy-to-follow instructions and diagrams. Removing the ignition lock cylinder may seem like a daunting task, but with the right tools and a bit of patience, you can do it yourself. Let’s dive in!
Tools You Will Need
Before we begin, make sure you have the following tools handy:
- Flathead screwdriver
- Phillips screwdriver
- Needle-nose pliers
- Hammer
- Drill (optional)
Step 1: Disconnect the Battery
Safety first! Start by disconnecting the battery to prevent any electrical mishaps while working on your Chevy’s ignition system. Locate the battery under the hood and use a wrench to loosen the negative (black) terminal first, then the positive (red) terminal. Set the disconnected cables aside.
Step 2: Remove the Steering Column Cover
Next, you’ll need to access the ignition lock cylinder by removing the steering column cover. Use a flathead screwdriver to gently pry off the cover, being careful not to damage it. Once removed, set the cover aside.
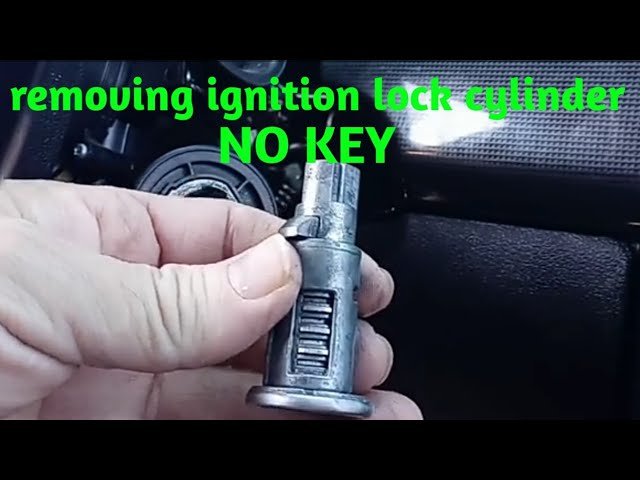
Step 3: Locate the Ignition Lock Cylinder
Now that you have exposed the steering column, locate the ignition lock cylinder. It’s a cylindrical component where the key would normally go. You may need to turn the steering wheel slightly to access it from the right angle.
Step 4: Release the Retaining Pin
The ignition lock cylinder is held in place by a retaining pin. Use a small tool or a straightened paperclip to press on the pin while gently pulling out the cylinder. This may require some wiggling and patience, but the cylinder should eventually come loose.
Step 5: Disconnect Electrical Connectors (If Applicable)
Depending on your Chevy model, there may be electrical connectors attached to the ignition lock cylinder. Carefully disconnect these connectors by pressing on the tabs and pulling them apart. Be gentle to avoid damaging the connectors.
Step 6: Remove the Cylinder Completely
Once the retaining pin is released and any electrical connectors are disconnected, you can now fully remove the ignition lock cylinder from your Chevy. Take your time and ensure you don’t force anything to prevent any damage.
Step 7: Optional – Drilling Out the Cylinder
If you are unable to release the retaining pin or if the cylinder is damaged beyond repair, you may need to resort to drilling it out. Use a drill with a metal-cutting bit to carefully drill into the cylinder until it can be removed. This should be a last resort option.
Step 8: Install the New Ignition Lock Cylinder
Once the old cylinder is removed, it’s time to install the new one. Simply reverse the steps you followed to remove the old cylinder, ensuring that the new one fits securely in place. Reconnect any electrical connectors and test the cylinder before reattaching the steering column cover.
Congratulations on successfully removing the ignition lock cylinder on your Chevy without a key! With the right tools and a bit of know-how, you can tackle this task on your own. Remember to reconnect the battery, test the ignition, and ensure everything is working properly before hitting the road. If you encounter any difficulties or feel unsure, don’t hesitate to seek professional help.
Thank you for following our step-by-step guide. We hope this article has been helpful and informative. Stay tuned for more DIY automotive tips and tricks!
how to remove the ignition cylinder-the fast way
Frequently Asked Questions
How can I remove the ignition lock cylinder from a Chevy without a key?
To remove the ignition lock cylinder from a Chevy without a key, you will need to first disconnect the battery to prevent any accidental airbag deployment. Then, use a small, sturdy tool like a paper clip or a punch tool to press the release button located on the underside of the ignition lock cylinder. This will help you remove the cylinder from the steering column.
Can I remove the ignition lock cylinder without special tools?
While it’s possible to remove the ignition lock cylinder without special tools, having tools like a punch tool or a paper clip can make the process easier. These tools can help you access and press the release button on the cylinder, allowing for a smoother removal process. If you don’t have these tools, you can try using a similar small, sturdy object to press the release button.
Is it necessary to disconnect the battery before removing the ignition lock cylinder?
Yes, disconnecting the battery before attempting to remove the ignition lock cylinder is crucial for your safety. This step helps prevent any electrical malfunctions or accidental airbag deployments while you are working on the ignition system. Always remember to disconnect the battery and wait for a few minutes before starting the removal process.
Final Thoughts
To conclude, removing the ignition lock cylinder in a Chevy without a key can be done efficiently by following the detailed diagram provided. It is crucial to follow each step precisely to avoid any potential damage to the vehicle. Remember to exercise caution and take your time when completing the process. By referencing the diagram how to remove ignition lock cylinder Chevy without key, you can successfully complete the task with confidence and precision.